Tuesday, December 29, 2009

What goes great with tea?

BISCOTTI!


I am recently obsessed with making and eating biscotti. I made dozens to give away for holiday gifts with my tea. (And kept a dozen or so to eat.) Biscotti is really great for holidays and any major event because its something you can make days or even a week in advance, store it, and still have a great tasting bake good!

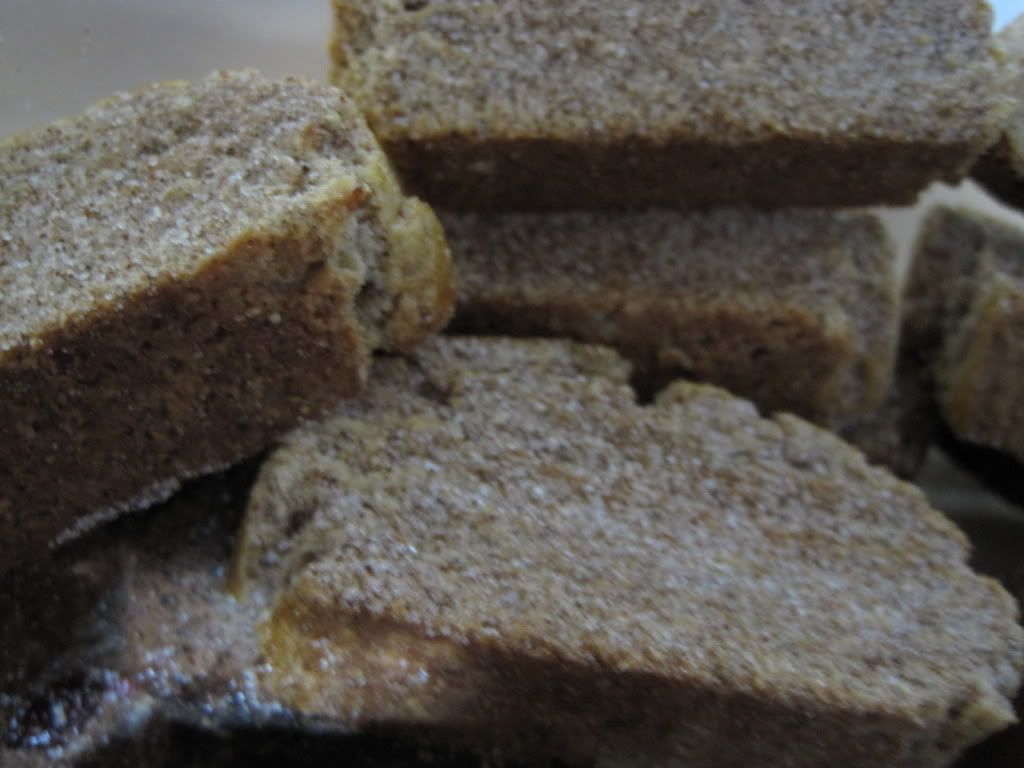
Cinnamon Sugar Biscotti

Yields: approx 20

You will need:
2 cups all-purpose flour
1 1/2 teaspoons ground cinnamon
1 teaspoon baking powder
1/4 teaspoon salt
2/3 cup white sugar
6 tablespoons butter
2 eggs
1 teaspoon vanilla extract
1 egg, beaten
3 tablespoons white sugar
1 teaspoon ground cinnamon

Directions:
  1. Preheat oven to 325 degrees F (165 degrees C). Line baking sheets with parchment paper.
  2. Sift together the flour, 1 1/2 teaspoon cinnamon, baking powder and salt, set aside. In a medium bowl, cream together the 2/3 cup sugar and butter. Beat in 2 eggs and vanilla. Stir in the dry ingredients.
  3. On a lightly floured surface, divide dough into two pieces. Roll each piece into a log about 9 inches long and 1 1/2 inches wide. Place logs on the prepared baking sheet and flatten slightly. Brush with the beaten egg.
  4. Bake for 25 to 30 minutes in the preheated oven, until golden and firm to the touch. Cool for 15 minutes.
  5. On a cutting board, slice each log into 1/2 inch slices, using a serrated knife. Place back on the baking sheet, cut side down, and sprinkle with a mixture of the remaining cinnamon and sugar. Return to the oven for an additional 15 to 20 minutes, until toasted. Cool on wire racks, and store in an airtight container.
Adapted from: Allrecipes.com

Friday, December 18, 2009

Easy Holiday Gift Idea: DIY Tea Bags

Here's a simple idea for everyone on your list: Package your own tea bags.


If you have lots of time on your hands, do what I did and make the entire thing from scratch from tea to bags to packages. You will need loose tea, which you can get at most stores, and press and seal tea bags, you can find them online or at a craft store. Put 1.5-2 TSP of loose tea in the tea bags and iron the bags shut.

If you have less time, you can repackage tea bags to add a personal touch.

You will need:
  • glue sticks
  • construction paper
  • markers
  • tea bags
  • scissors
Steps:
  1. Take a piece of construction paper and fold it in half length-wise and then again width-wise.
  2. Cut along the folds to make four even rectangles.
  3. Fold the edges of each rectangle approximately 1/2 inch in.
  4. Fold the paper in half so that there is 1/2 inch at the top for a fold over tab.
  5. Apply glue inbetween the fold to create an envelope for the tea bag.
  6. If you want to, cut the excess paper from the inside of the envelope fold.
  7. Draw a design on the front of the envelope or write the name of the tea you will be putting inside.
  8. Place the tea bag inside the envelope.
  9. Glue the edges of the inside of the tab and fold it over to seal the tea bag inside.


Coffee Cake Muffins

Since Tuesday, I have easily made over 200 of these. I've been making mini muffins for holiday parties and brunches and full sized muffins for myself for breakfast. These are hands down my favorite muffin of all times.

You will need:
  • 1/2 c. firmly packed brown sugar
  • 1/2 c. chopped walnuts or pecans (optional)
  • 2 tbsp. all-purpose flour
  • 2 tbsp. butter, melted
  • 2 tsp. ground cinnamon
  • 1 1/2 c. all-purpose flour
  • 1/2 c. sugar
  • 2 tsp. baking powder
  • 1/2 tsp. salt
  • 1/4 c. shortening
  • 1/2 c. milk
  • 1 egg, beaten
Topping:
Preheat oven to 375°F.

In a small bowl, combine brown sugar, walnuts, 2 tablespoons of flour, butter, and cinnamon; stir well, and set aside.

Muffins:
In a medium bowl, combine 1 1/2 cups flour, sugar, baking powder, and salt in a large bowl; cut in shortening until mixture resembles coarse crumbs.

Beat egg, stir in milk to combine. Stir milk and egg mixture into the dry mixture in the medium bowl. Mix quickly, about 30 seconds, until combined.

Turn mixture into a greased or paper-lined muffin pan, filling cups 2/3 full. Sprinkle topping evenly over the top of muffins.

Bake at 375°F for 15-20 minutes or until a cake tester inserted into the center of a muffin comes out clean.

Nothing better than chocolate chip cookies

I have been on a severe baking kick lately. I am going to attribute this to cold weather and the holidays. So I made these chocolate chip cookies the other day using the original tollhouse recipe. The secret to getting them to look like mine: when putting the dough on the baking sheet, measure it out one table spoon and roll it into a ball.

Happy baking!


You will need:
  • 2 1/4 cups all-purpose flour
  • 1 teaspoon baking soda
  • 1 teaspoon salt
  • 1 cup (2 sticks) butter, softened
  • 3/4 cup granulated sugar
  • 3/4 cup packed brown sugar
  • 1 teaspoon vanilla extract
  • 2 large eggs
  • 2 cups (12-oz. pkg.) NESTLÉ® TOLL HOUSE® Semi-Sweet Chocolate Morsels
  • 1 cup chopped nuts (optional)

Directions

PREHEAT oven to 375° F.

COMBINE flour, baking soda and salt in small bowl. Beat butter, granulated sugar, brown sugar and vanilla extract in large mixer bowl until creamy. Add eggs, one at a time, beating well after each addition. Gradually beat in flour mixture. Stir in morsels and nuts. Drop by rounded tablespoon onto ungreased baking sheets.

BAKE for 9 to 11 minutes or until golden brown. Cool on baking sheets for 2 minutes; remove to wire racks to cool completely.

PAN COOKIE VARIATION: Grease 15 x 10-inch jelly-roll pan. Prepare dough as above. Spread into prepared pan. Bake for 20 to 25 minutes or until golden brown. Cool in pan on wire rack. Makes 4 dozen bars.

SLICE AND BAKE COOKIE VARIATION:
PREPARE
dough as above. Divide in half; wrap in waxed paper. Refrigerate for 1 hour or until firm. Shape each half into 15-inch log; wrap in wax paper. Refrigerate for 30 minutes.* Preheat oven to 375° F. Cut into 1/2-inch-thick slices; place on ungreased baking sheets. Bake for 8 to 10 minutes or until golden brown. Cool on baking sheets for 2 minutes; remove to wire racks to cool completely. Makes about 5 dozen cookies.

* May be stored in refrigerator for up to 1 week or in freezer for up to 8 weeks.

FOR HIGH ALTITUDE BAKING (5,200 feet): Increase flour to 2 1/2 cups. Add 2 teaspoons water with flour and reduce both granulated sugar and brown sugar to 2/3 cup each. Bake drop cookies for 8 to 10 minutes and pan cookie for 17 to 19 minutes.

From: Nestle

Thursday, November 5, 2009

i'm blue

Before I leave for a Las Vegas vacation, I figured I would share a pretty set of extensions I finished.

This is a full set of 18inch human hair extensions. Enjoy!

Thursday, October 29, 2009

bakerella cake pops

Let me tell you, I absolutely LOVE bakerella's cake pops. I was checking out her blog this morning and got completely inspired to make my own Halloween cake pops. They are so fun to make and super tasty. I think this is going to be something I make again over the weekend. Last time I made them I decided it would be a good idea to double the size of the pops.. It did not prove to be a good idea at all. This is my favorite Halloween example of her work. Check out how to make cake pops of your own and her shopping list for making Halloween cake pops.

Sunday, October 18, 2009

oh the pretty colors

I've been pretty busy lately with life in general, but not to busy where I can't make some extensions. I ordered a ton of clips so I have been making tons of full sets lately, all human hair of course. I have a platinum blonde set, a turquoise set, and a hot hot pink set. So much fun. Maybe some will pop up on my etsy site in the future..

Saturday, September 19, 2009

$1 Shipping Sale

Just figured I would let you all know that my shop is having a $1 shipping sale for US and Canada buyers. This is gonna end November 1st, so now would be a good time to get a custom order in or purchase sometime I already made.

Etsy: Your place to buy & sell all things handmade
creationsbycate.etsy.com


I am going to try and add some new stuff before the month ends, so check back often.

Thursday, September 17, 2009

As promised..

I know I said I would do this days ago but better late than never!

So here's 4 out of 6 of the tie dye shirts I made recently. For whatever reason one of the bull-eye shirts decided to do some weird.. dying pattern in the center. I am sure you will be able to spot it when you see it.


I'll post the other two sometime after I wash them. They are my favorite so I have been wearing them.. a lot.

I've been working on clip-in hair extensions this week so expect to hear more of that soon.

Friday, September 11, 2009

tie dye-ing up a storm!

I have been extremely busy lately with school and work and unfortunately haven't had much time to do the things I enjoy. But when I have time, I find myself tie dying more than anything lately. My friends and I really enjoy having tie dye sessions/parties and trying out new color combos. Our new favorite color is by dylon called "bahama blue." (In the pictures it will appear as the really vibrant bright blue)

While I am still very much into making spiral designs, I started making a few "bulls-eye" shirts. These are probably the simplest to tie in three easy steps.
  1. lay shirt flat and with your fingers, pinch where you want the "bulls-eye" to start
  2. tie off sections with string or rubber bands (you can twist the shirt as you tie it off for a different look
  3. and dye away!
When it's all sectioned off and dyed it should look like this:
Fun stuff!

I'll work on posting pictures of the completed shirts hopefully later today. This batch came out fantastic and is one of my favorites so far.. but I probably say that everytime about everything. =]

Monday, August 31, 2009

Imagine that!

As you may have guessed, over the past week or so I was on a vacation. But that doesn't mean I wasn't thinking about my favorite hobby, beading. In fact, I got a chance to check out a central Florida's largest full-service bead store.

Located in Ormond Beach, is a store called Imagine that! ...a bead store. They specialize in unique and vintage beads. Let me tell you I was in heaven. I could not decide what I wanted. Their selection is fantastic, from seed beads to semi-precious stones to amber, Australian crystal, pearls, lamp-worked beads and more! If you have a good idea what you are doing, this store has just about every supply you could possibly need to get you on your way. If you are new to beading, their staff is friendly and willing to help you get what you need as well as sit down at the in-store work table and help you make it.

Imagine that! really had a wonderful atmosphere to it. If I had more vacation time in that area, I probably would have checked out one of their weekly classes.

If you find yourself in the area, its worth checking out no matter what your beading skill level is.

Thursday, August 13, 2009

To DYE for..


Well, today was slightly overcast and otherwise dull. So I figured it would be a good day to spice it up with some tie dye-ing. Its simple enough and load of psychedelic fun.

You don't need much, just:
  • some random clothes (white fabric for best results)
  • fabric dye (I used dylon)
  • rubber bands or string
  • squirt bottles or plastic cups (for when you want to use multiple colors to dye)
  • garbage bags (to catch any dye mess you will make indoors)
  • rubber gloves
  • soda ash (also know as sodium carbonate. This is optional)
  • plastic wrap
The comes the fun. Once you have on some clothes and shoes you don't mind getting messy, set up your workspace by laying down the garbage bags. Take your garments, which should be pre-washed. Fill a bowl or basin with water and if you desire add one cup of soda ash to every gallon of water and soak your garments for 15-60 minutes. You will want to use gloves from this point on. If you feel you have difficulty tying up your garment with gloves on, do it before you soak it.

For this batch I did a lot of spirals. These are easy to do once you get the hang of it.
  • Simply lay the garment flat on the floor.
  • Grab a fork and stick it where ever you want the center of the spiral to be.
  • Then twirl the fork and the garment like you are twirling spaghetti.
  • Do it slowly and be sure to press the garment together to keep it tight.
  • Once it's all twirled up, place rubber bands around the garment to hold it tightly together.

Once your garment is all tied up its time to dye it up. Prepare all your dye according to the package directions. Make sure you follow them otherwise your dye wont be as bright! Squirt or pour the dye randomly or over certain sections, just make sure you thoroughly soak the garment!
Then let the dye set. Its best to wait at least 8 hours so you might choose to wrap up the garment in plastic wrap and leave it over night. (By wrapping it up you keep the dye from drying out)

Once the wait is over, rise the garment by hand in cold water until the water runs clear. Its also a good idea to run it through the washing machine in 2 or 3 hot washes and rinse cycles. You can wear the garments after this, but just in case you may choose to wash it separate from you other clothes for a while to make sure the dye doesn't bleed.
Remember to have fun with it! Try tying your garments different ways to get different patterns. Every time you rinse out your garments you will be in for a surprise.

Sunday, August 2, 2009

Extensions

So today I finished the extensions Colleen wanted. We put them in her hair and they looked really good. She does need more though to even it out but that's something we can easily take care of. They are easy enough to make.. and it's so much cheaper to make them yourself. Colleen and I decided to go with a synthetic hair because it looks so similar to hers, plus its a good $15 cheaper than the human hair. Here's some before and after pictures..

These are the pieces I made for her. One single weft 4 inch extension, one double weft 4 inch extension, and two double weft one inch extensions.
BEFORE


AFTER

Kasanika Customer Post. =]

Remember one of my ocean themed necklaces, the simple starfish? Well, I recently received a customer photo from kasanika on etsy. I am so glad she is enjoying it.
P.S. If you get a chance you should check out some of her stuff on etsy. She makes some pretty unique and cute felt items, like her Klean Kanteen! Not that I have a kids sippy cup, but maybe she could make one for a flask or something. I totally want it so pay attention family and friends!

Tattoo Star and Heart Necklace

It's been a while since I've posted something. My apologies. I have been super busy.

But I have still been crafting it up. I had a custom order brass knuckles necklace I recently completed. I wish I had a better picture than this one:
I also made a few random necklaces, one of which was this tattoo star and heart necklace. It's made from recycled plastic that I doodled on, baked, and put on a stainless steel colored choker cord. Nice huh?
Also I started making clip-in extensions for myself and my sister. I am working on her set tonight. It's surprisingly easy. Perhaps when I get a chance later this week I will post a brief tutorial and let you know how mine came out. Till then, take care and stay crafty.

Thursday, July 16, 2009

Destructed T-Map Card Holder

So this was a complete project gone wrong gone right. I was trying to make the cover for a small notebook for a friend of mine. However when baking the plastic cover, it folded up into this super odd shape and I didn't have the heart to bend it back down. I mean, the shape intrigued me. So I decided to see what I could do with it.

Since the cover was supposed to be a map of the Boston Subway system, the fact that it was crumbled and a little deconstructed, it looked like something you might find on the ground in Boston. I decided I was either going to use this as some sort of coin or key dish. So I painted the back of it concrete gray and sprayed the whole piece with sealer. However the ink on the inside in some areas began to run like it had been rained on. I kind of liked that it got even more destructed.

After finishing it, I decided to try and stick some business cards in it and what do you know? Perfect fit! So different, but so unique.

Wednesday, July 15, 2009

More pi Anyone?

So with my newly rekindled love of shrinking plastic to make necklace focal pieces, I kept trying to think of neat ideas. I had been trying a few different ways to make the "not-so-brass" knuckles and I am perfecting that look. Also I decided I needed to buy new chains or wires to put these focal pieces on. I found these really nice looking precut wire necklaces on etsy.com and figured they could be perfect.

I decided I would try out the wire necklace with a PI necklace. The PI charm came out really cool because I originally sprayed it black, but when I was spraying a lotus flower outline necklace a little bit to close to it, it got silver speckles on it. Here's the end result for both the PI necklace and the lotus flower outline necklace:


Saturday, July 11, 2009

Happy Hour Lamps?

So, I am looking to re-do parts of my room and make it more colorful and unique. In my spare time googling random things, I cam upon this idea for a cocktail umbrella lamp. This look so fun and colorful! I have to have it!
Apparently the idea was made popular by a Rhode Island School of Design student. Such a fun play on such an ordinary object.

I have go to try this some time soon. You can try it too, here's the DIY tutorial from HGTV.com

Wednesday, July 8, 2009

Not-So-Brass Knuckles

So today I spent so much time working with shrinking number 6 plastic. I decided to make some nice cut outs for necklace. I picked out a set of brass knuckles, inspired by the ones worn by Brittanya on Rock of Love Bus and Charm School 3. I also picked a lotus flower since those are one of my favorite flowers.

So after cutting, baking, shrinking, spray painting, and glossing this was my end result:
I can't wait to wear them once they are completely dry.. I also can't wait to make more.

Monday, July 6, 2009

I love Clearance Sections!

I am a complete sucker for a good clearance section. I tend to stockpile when I see things for $2 and under. Yesterday I completely hit the jackpot though. While buying tons of stuff for no apparent reason I grabbed 5 balls of yarn. They are so cute and look like sherbert, I really couldn't resist. Well after checking out and sitting in my car looking over the receipt, I noticed the yarn have rung in as $0.01! Score! I was temped to go back in and get more but figured, the cashier might notice. Maybe next time..

What luck and savings though!

Sunday, July 5, 2009

Sweet Pea

This was a nice little surprise from my bean plant the other day. So pretty.

Knitting away...

I have been busy lately with odds and ends. Some school stuff. Some unnecessary stuff. But I have still had plenty of time to knit.

My great aunt Dorie taught me to knit back when I was 8 or 9. It has always been one of those things I do to relax when I get stressed. But I honestly hadn't done it in so long so when my friend Kayla and I decided to knit and crochet again I was excited. I've actually been more productive knitting than I have been with my beading lately, which is surprising.

First I made a few hats. I know, its summer in New England and not the best hat weather. But, I really wanted something to keep my long hair out of my face and off my back. So I made a very loosely knit almost hairnet-type beanie. But after wearing it a few times and being less than satisfied with it, I decided I wanted to make a long slouchie beanie. Something that was somewhat rasta looking. So I made one! I was actually really happy with how this one came out. The way the multicolored yarn wound up swirling around the beanie was awesome. I am going to make a few more, but I am going to make them with a brim and on the inside of the brim will be a ribbon one can tie to adjust the beanie to stay tighter on your head.

Last night I decided to try and make a bag. It took me a few hours to do but it was worth it. I was very pleased with the result and the colors really worked out well. My only issues is I wish I had made it a little wider. Right now it is about 8 inches wide, which is a pretty good size. I just kind of wanted to make it the size of a canvas tote bag. It still is super cute for a small beach bag or something. I'll be making more for sure. Maybe I will make a slouch beanie in this color since i have yarn left over. Perhaps...

Thursday, June 25, 2009

Blue da ba dee!

A while back I made a really really super long necklace out of these really cute looking polka dot beads. When I say long I really mean it. The necklace you could wrap around your neck three times and still have it hanging down towards your waist. The only problem was, it was so long it constantly got tangled and was tricky to untangle. So I figured it was time to make a similar necklace but at a more manageable length.

I found the perfect glass beads and began to wire wrap them all up, with no real rhyme or reason to the pattern. (I think long necklaces look better without patterns) This is what I came up with:

Not bad. I do however think I need to add a few inches too it. I still feel it is too short even though you can just throw it over your head and wear it. What can I say, I really liked the super long necklace!

I am going to make another one with purple beads. I think I will try and figure out a way to perfect the waist length necklace and keep it from getting super messy in storage.

Tuesday, June 23, 2009

I feel the need to show off

In February for my boyfriend's birthday I decided I would make him a cake and not just any cake but a cupcake cake. AND NOT JUST ANY CUPCAKE CAKE! But a MegaMan 8-bit inspired Cupcake cake!

My creation keeps getting me credit with his male friends, co workers, and even fellow bloggers he shows it off too, like Protodude's Rockman Corner. Everyone seems to be so in awe of how many mini cupcakes I baked, frosted, and arranged for this birthday surprise. (By the way, it was upwards of 128+, a few for the cake and a few for the baker.)

Now, this is not the first MegaMan thing I have ever made him. Throughout the almost 10 years know we have know and dated each other, he has had a rather unhealthy obsession with this game and as any hardcore gamers girlfriend knows, there is no end to this obsession... ever. After a few years, you tend to run out of store made merchandise and video games to buy an addict, so you resort to making your own stuff. I've made him hats, embroidered shirts, collages of shirts and pictures autographed by the games creator, pj pants.. you name it I have probably made it or I am making it for the next event.

I had wanted to make a full size cake for him and decided on mini cupcakes. The only problem is I was running out of space to lay the cake out. So a quick change of plans and I arranged a head. If I hadn't run into that little problem of space I probably would have finished quicker, but from start to finish it took me a total of 4 hours! The end result was awesome and yummy and stunned my boyfriend who to this day does not stop talking about it. In his eyes I have apparently won the best girlfriend of the year award. Only problem is now I have to top myself next year. ;-)