As you may have guessed, over the past week or so I was on a vacation. But that doesn't mean I wasn't thinking about my favorite hobby, beading. In fact, I got a chance to check out a central Florida's largest full-service bead store.
Located in Ormond Beach, is a store called Imagine that! ...a bead store. They specialize in unique and vintage beads. Let me tell you I was in heaven. I could not decide what I wanted. Their selection is fantastic, from seed beads to semi-precious stones to amber, Australian crystal, pearls, lamp-worked beads and more! If you have a good idea what you are doing, this store has just about every supply you could possibly need to get you on your way. If you are new to beading, their staff is friendly and willing to help you get what you need as well as sit down at the in-store work table and help you make it.
Imagine that! really had a wonderful atmosphere to it. If I had more vacation time in that area, I probably would have checked out one of their weekly classes.
If you find yourself in the area, its worth checking out no matter what your beading skill level is.
Monday, August 31, 2009
Thursday, August 13, 2009
To DYE for..
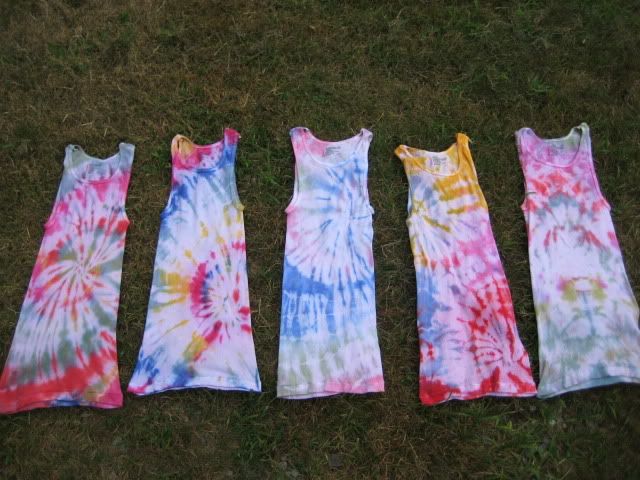
Well, today was slightly overcast and otherwise dull. So I figured it would be a good day to spice it up with some tie dye-ing. Its simple enough and load of psychedelic fun.
You don't need much, just:
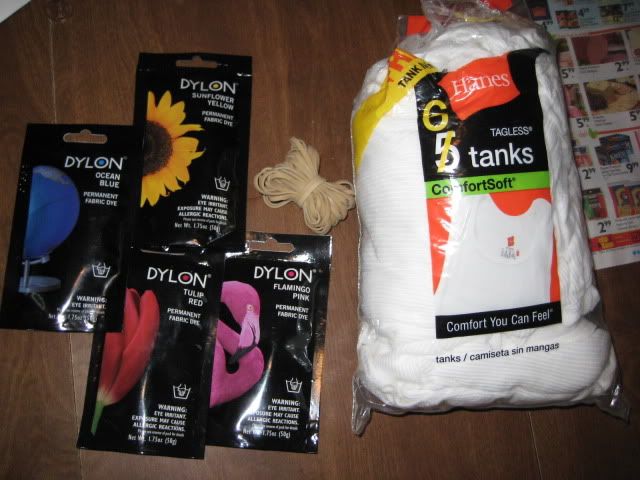
- some random clothes (white fabric for best results)
- fabric dye (I used dylon)
- rubber bands or string
- squirt bottles or plastic cups (for when you want to use multiple colors to dye)
- garbage bags (to catch any dye mess you will make indoors)
- rubber gloves
- soda ash (also know as sodium carbonate. This is optional)
- plastic wrap
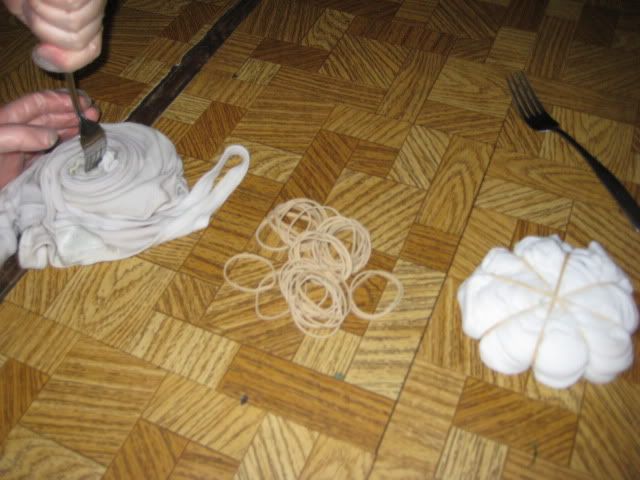
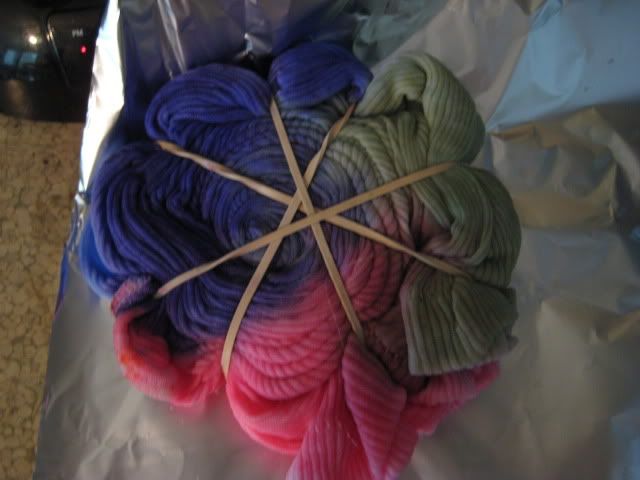
For this batch I did a lot of spirals. These are easy to do once you get the hang of it.
- Simply lay the garment flat on the floor.
- Grab a fork and stick it where ever you want the center of the spiral to be.
- Then twirl the fork and the garment like you are twirling spaghetti.
- Do it slowly and be sure to press the garment together to keep it tight.
- Once it's all twirled up, place rubber bands around the garment to hold it tightly together.
Once your garment is all tied up its time to dye it up. Prepare all your dye according to the package directions. Make sure you follow them otherwise your dye wont be as bright! Squirt or pour the dye randomly or over certain sections, just make sure you thoroughly soak the garment!
Then let the dye set. Its best to wait at least 8 hours so you might choose to wrap up the garment in plastic wrap and leave it over night. (By wrapping it up you keep the dye from drying out)
Once the wait is over, rise the garment by hand in cold water until the water runs clear. Its also a good idea to run it through the washing machine in 2 or 3 hot washes and rinse cycles. You can wear the garments after this, but just in case you may choose to wash it separate from you other clothes for a while to make sure the dye doesn't bleed.
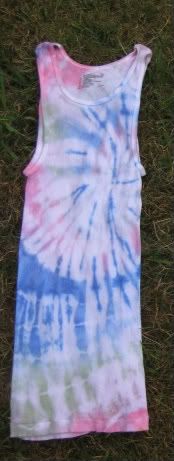 Remember to have fun with it! Try tying your garments different ways to get different patterns. Every time you rinse out your garments you will be in for a surprise.
Sunday, August 2, 2009
Extensions
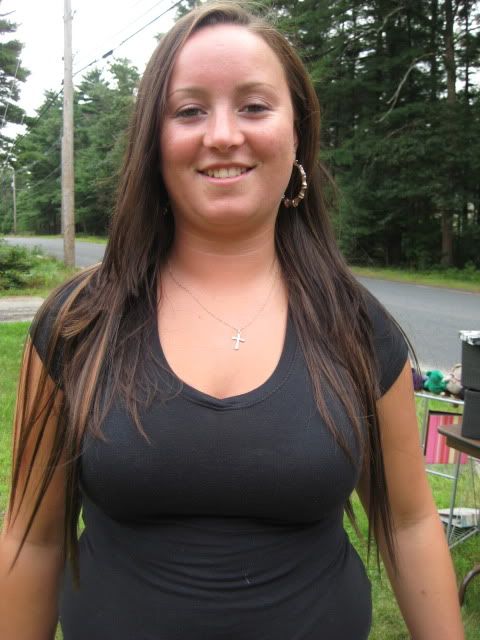
So today I finished the extensions Colleen wanted. We put them in her hair and they looked really good. She does need more though to even it out but that's something we can easily take care of. They are easy enough to make.. and it's so much cheaper to make them yourself. Colleen and I decided to go with a synthetic hair because it looks so similar to hers, plus its a good $15 cheaper than the human hair. Here's some before and after pictures..
These are the pieces I made for her. One single weft 4 inch extension, one double weft 4 inch extension, and two double weft one inch extensions.
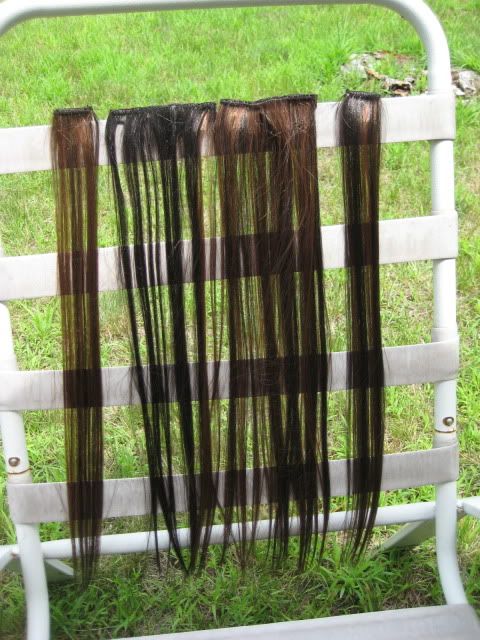
 BEFORE
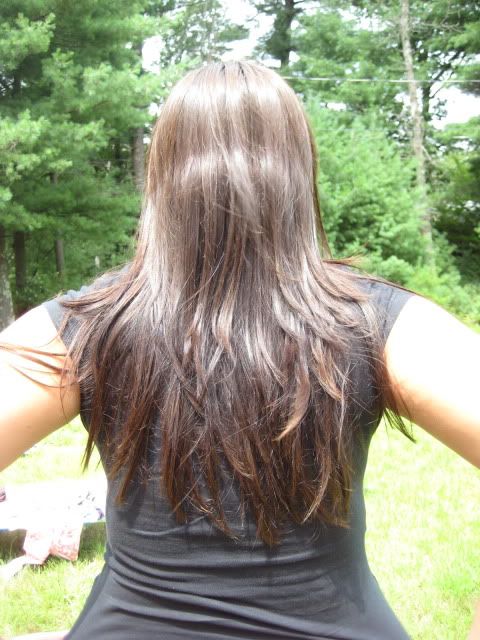
These are the pieces I made for her. One single weft 4 inch extension, one double weft 4 inch extension, and two double weft one inch extensions.
BEFOREAFTER
Kasanika Customer Post. =]
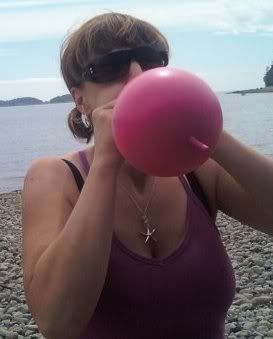
Remember one of my ocean themed necklaces, the simple starfish? Well, I recently received a customer photo from kasanika on etsy. I am so glad she is enjoying it.
 P.S. If you get a chance you should check out some of her stuff on etsy. She makes some pretty unique and cute felt items, like her Klean Kanteen! Not that I have a kids sippy cup, but maybe she could make one for a flask or something. I totally want it so pay attention family and friends!
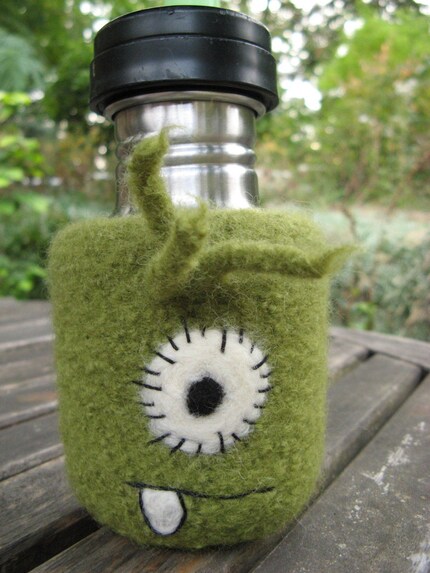
P.S. If you get a chance you should check out some of her stuff on etsy. She makes some pretty unique and cute felt items, like her Klean Kanteen! Not that I have a kids sippy cup, but maybe she could make one for a flask or something. I totally want it so pay attention family and friends!
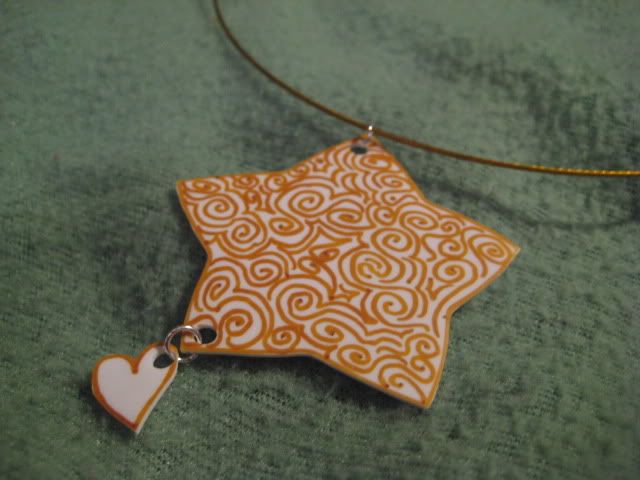
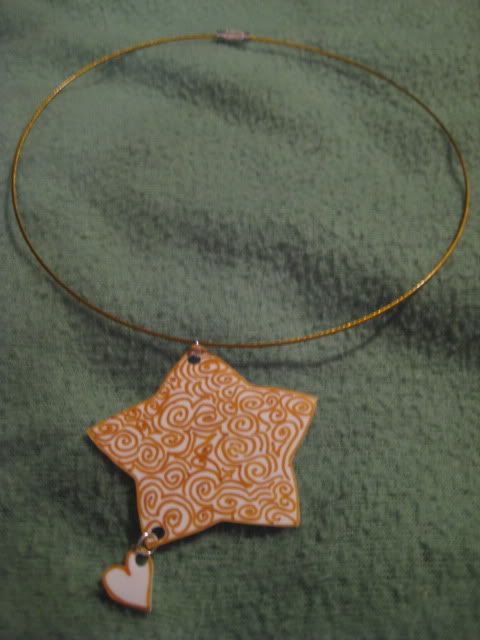
Tattoo Star and Heart Necklace
It's been a while since I've posted something. My apologies. I have been super busy.
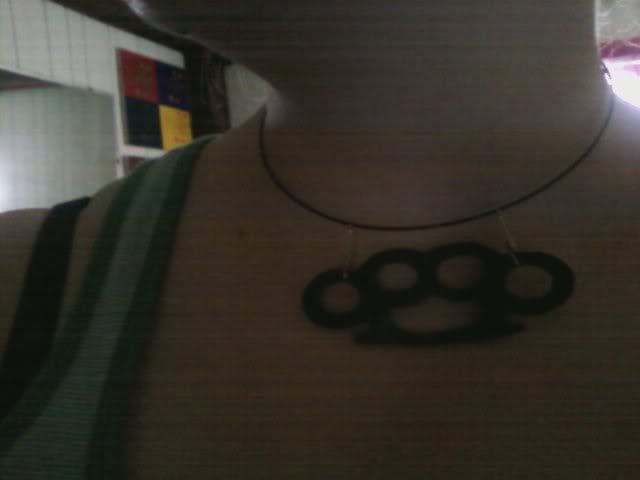
But I have still been crafting it up. I had a custom order brass knuckles necklace I recently completed. I wish I had a better picture than this one:
 I also made a few random necklaces, one of which was this tattoo star and heart necklace. It's made from recycled plastic that I doodled on, baked, and put on a stainless steel colored choker cord. Nice huh?
 Also I started making clip-in extensions for myself and my sister. I am working on her set tonight. It's surprisingly easy. Perhaps when I get a chance later this week I will post a brief tutorial and let you know how mine came out. Till then, take care and stay crafty.
But I have still been crafting it up. I had a custom order brass knuckles necklace I recently completed. I wish I had a better picture than this one:
I also made a few random necklaces, one of which was this tattoo star and heart necklace. It's made from recycled plastic that I doodled on, baked, and put on a stainless steel colored choker cord. Nice huh?Also I started making clip-in extensions for myself and my sister. I am working on her set tonight. It's surprisingly easy. Perhaps when I get a chance later this week I will post a brief tutorial and let you know how mine came out. Till then, take care and stay crafty.
Subscribe to:
Posts (Atom)